|
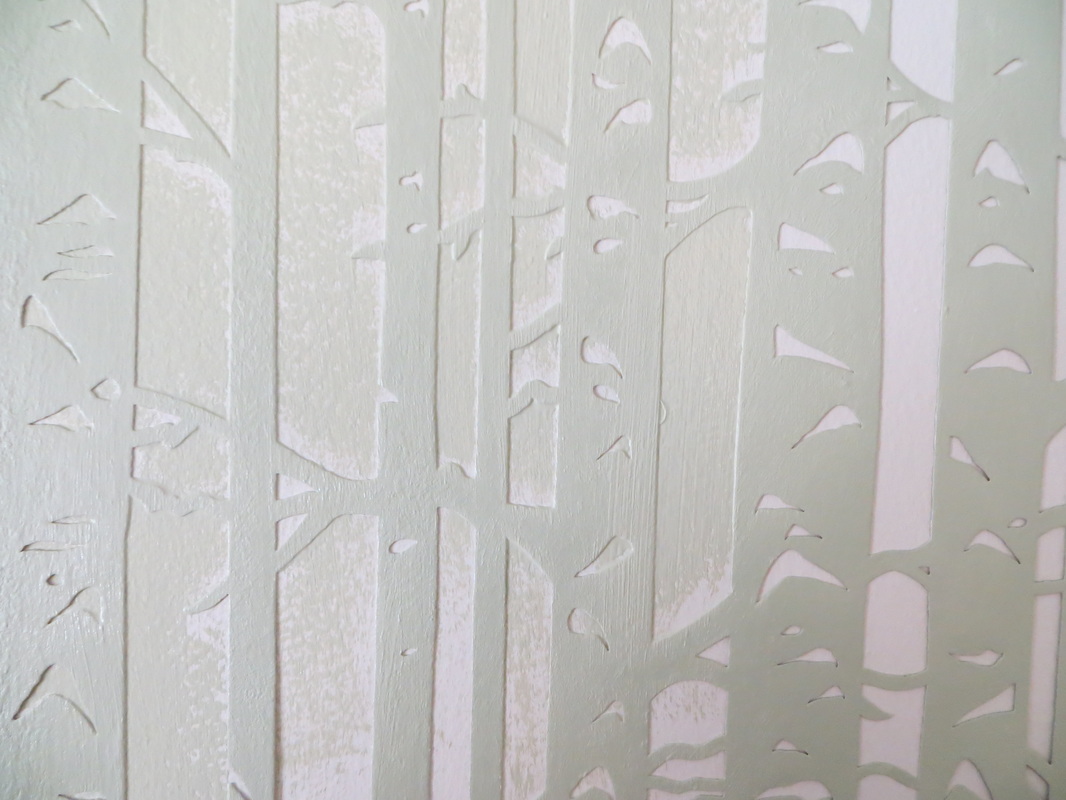
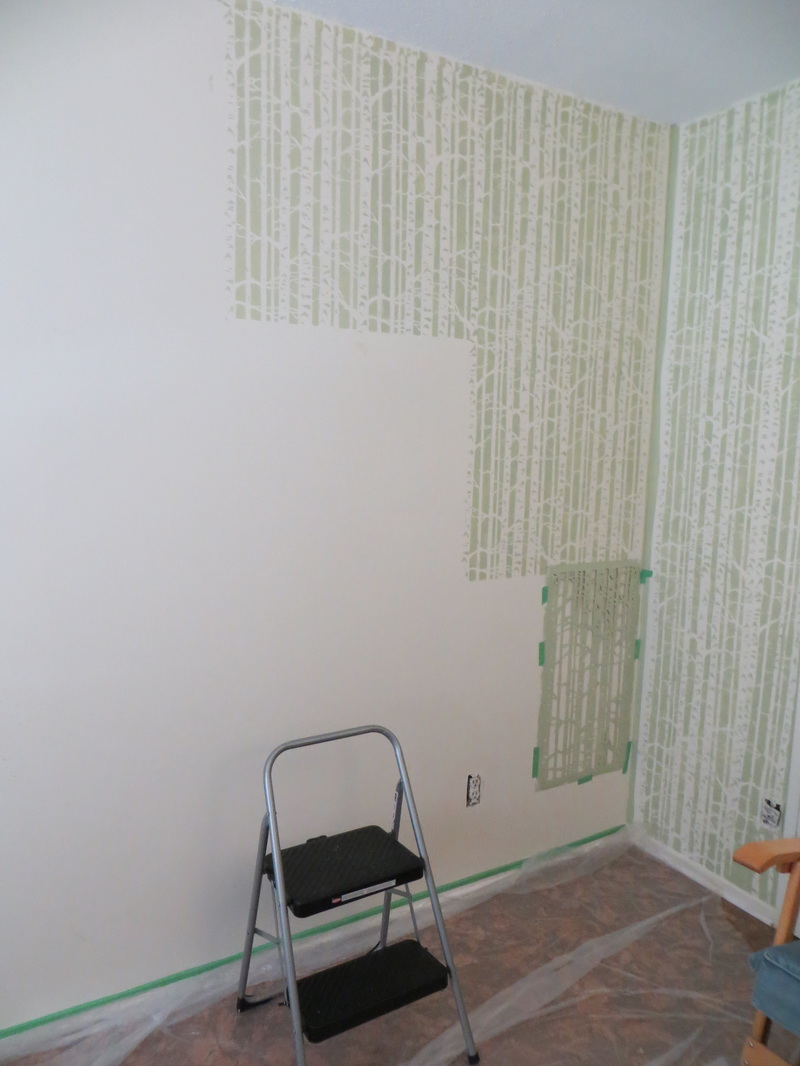
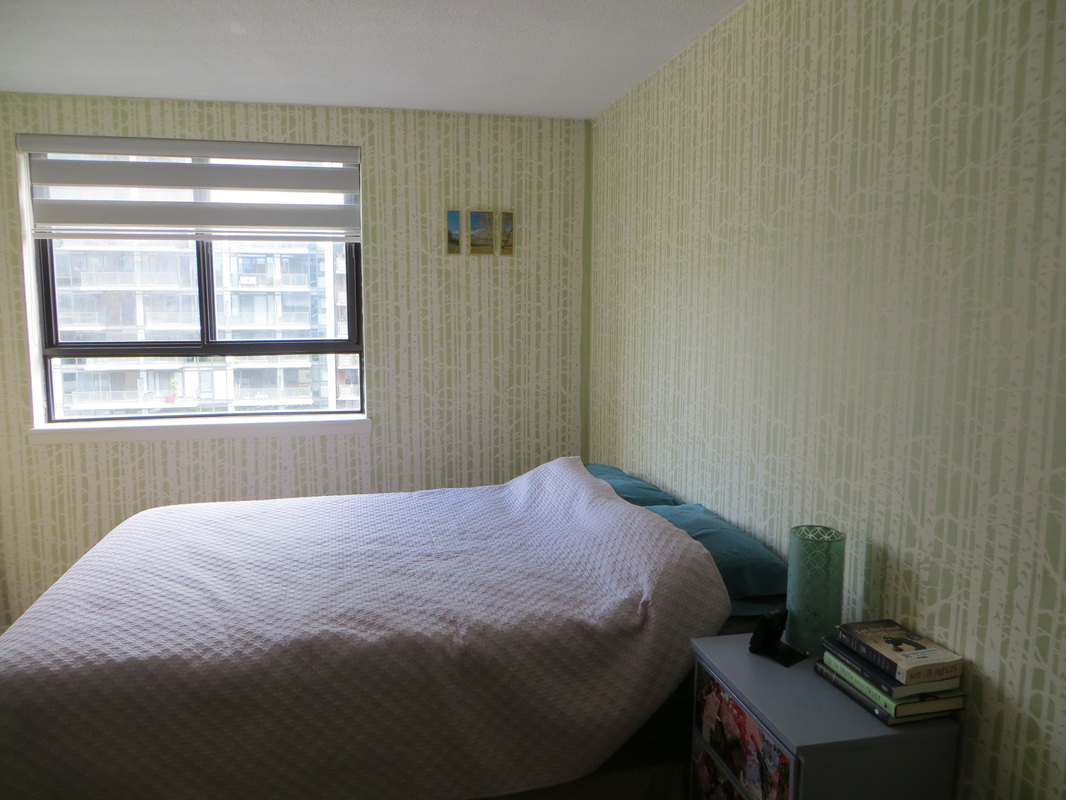
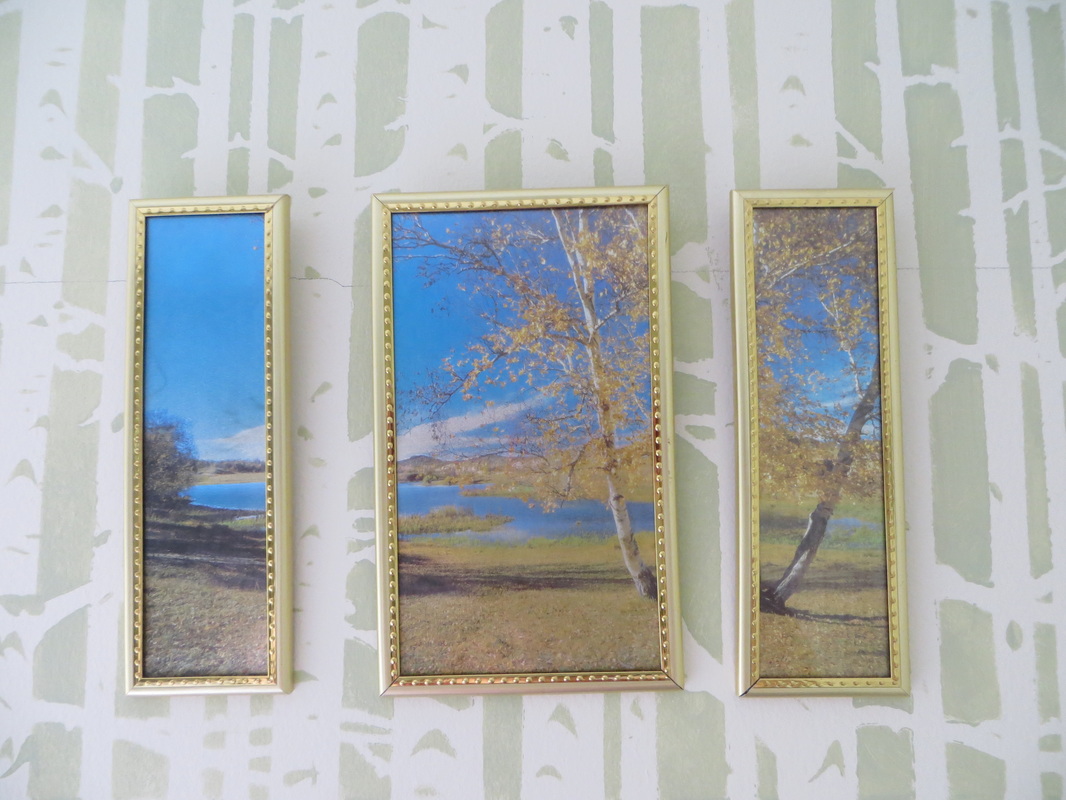
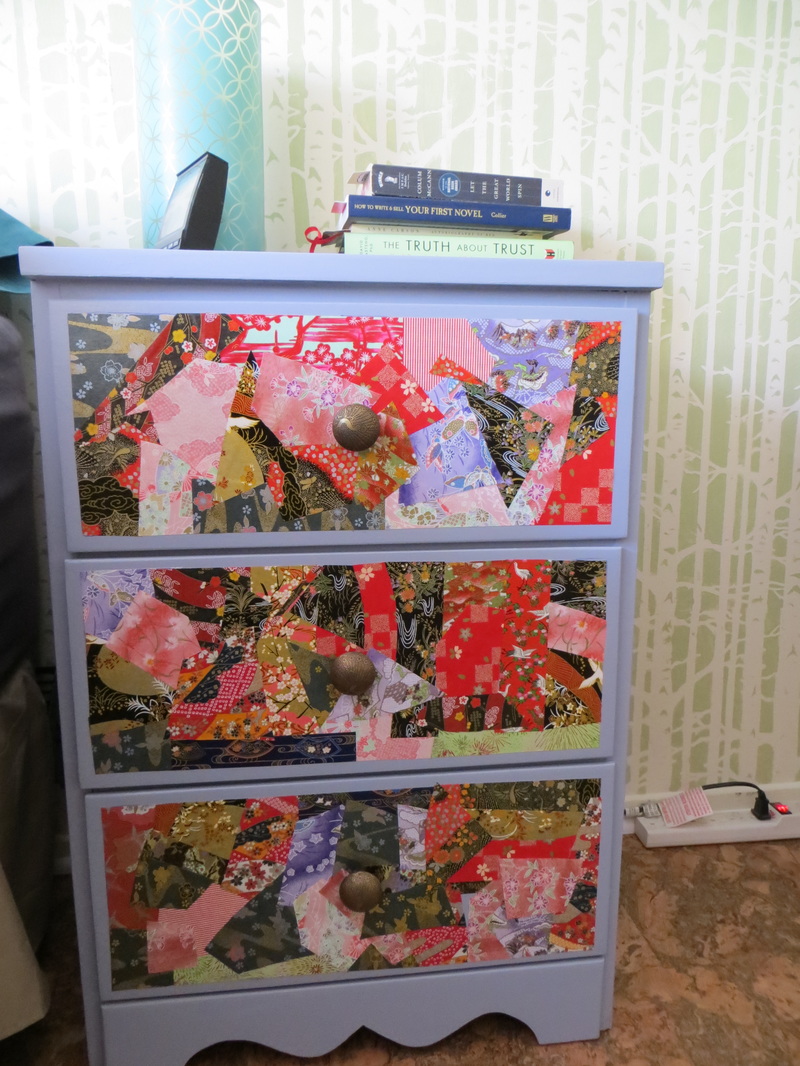
GUEST POST by AMY BARTLETT There is nothing like a blank wall to shrivel your spirit into a hollow nub of blah.... Time for some decoration! I love birch trees, and was originally thinking of putting up some cool birch wall paper or a photo mural in my bedroom. However, after spending WAY too much time looking at options, I soon realized that these options would cost many hundreds of dollars to execute.... not an economical option. Enter stage left: a cheap wall stencil bought online, some paint I had leftover from my bathroom painting experiment, and a whole lot of time. Stenciling walls like this is not a quick project, but it is a very cheap alternative and in my opinion has come out really well. PS: In a fit of painting inspiration, i also refinished and decoupaged my bedside table drawers with a random collage of ornate japanese papers I had leftover from another project--- see bonus pic at the end! Equipment/ Cost for the wall stenciling: 9$ for the wall stencil 0$ for paint (though originally cost about 15$--- I used about 2/3 of a small can) 4$ in painters tape 3$ for small paint brush (plus a small artist brush for touch ups as needed) 1$ for a plastic drop cloth from the dollar store 0$ in time (though it took about 15 hours in total for the three walls... eep) 0$ for a LOT of downloaded podcasts (I recommend Comedy Bang Bang, Dear Hank and John, Star Talk with Neil Degrass-Tyson and On Being with Krista Tippet) Lessons learned: - The stencil came with a small starter section to start off at the ceiling which was handy. I would recommend using this piece first across the top of your wall and then using that pattern as a guide to match up with the rest of the larger panels - I staggered the panels vertically (see pics) and painted from the leading edge/ outside to the inside of the stencil so that i could keep the painting process going without stopping--- for example, by the time i got a panel in row three done, the leading edge of row one had dried and i could easily put the stencil against the edge of the pattern without creating smudges #timemanagement - Use very little paint, an almost dry brush, and employ more of a rubbing or patting motion instead of your traditional up-and-down painting motion-- a dry, circular technique helps with the drying time and with getting into the small crevices of the pattern - I taped all around the walls, bottom trim and ceiling which allowed me to be a bit more casual with my stenciling at the edges. After so many hours of work, it is nice to have the extra insurance--- worth the time to do this taping, in my opinion I still have one more wall to paint (in a solid color) and to decorate the room more generally, but i am thrilled with the outcome, and to have banished those boring white walls with some organically-themed and cost effective color!
1 Comment
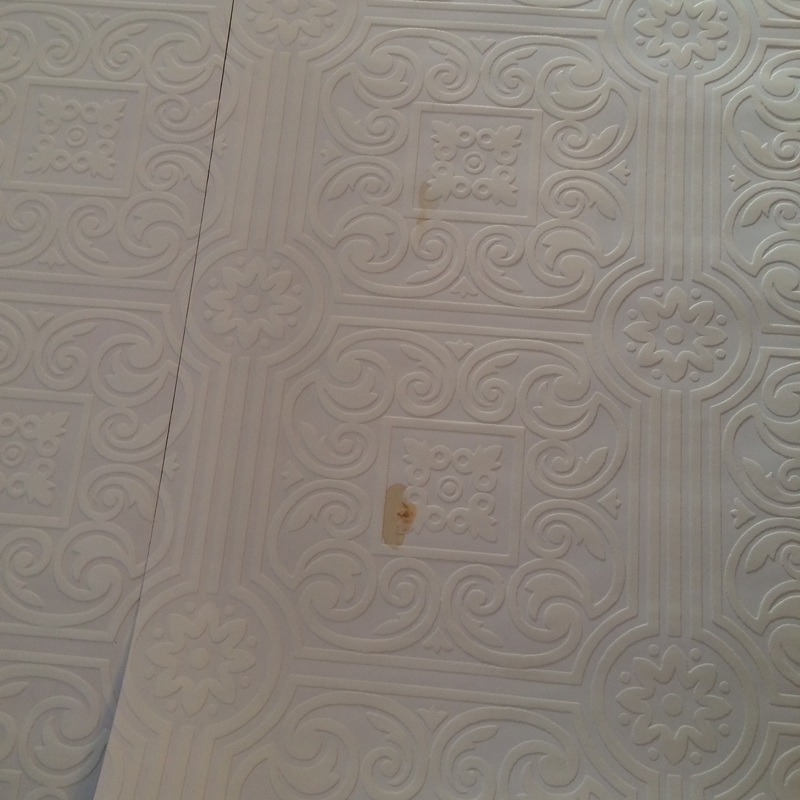
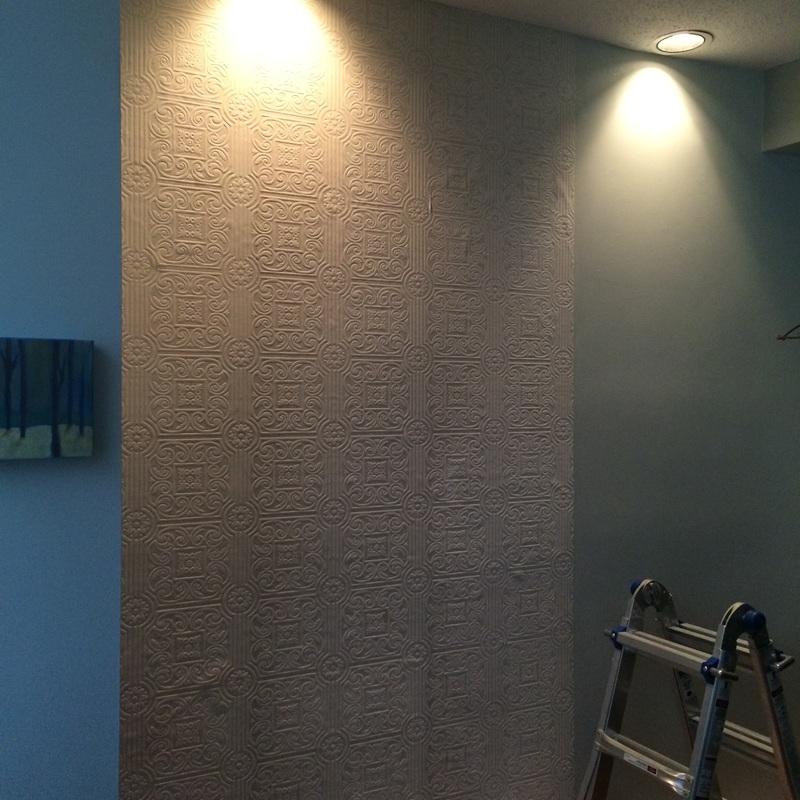
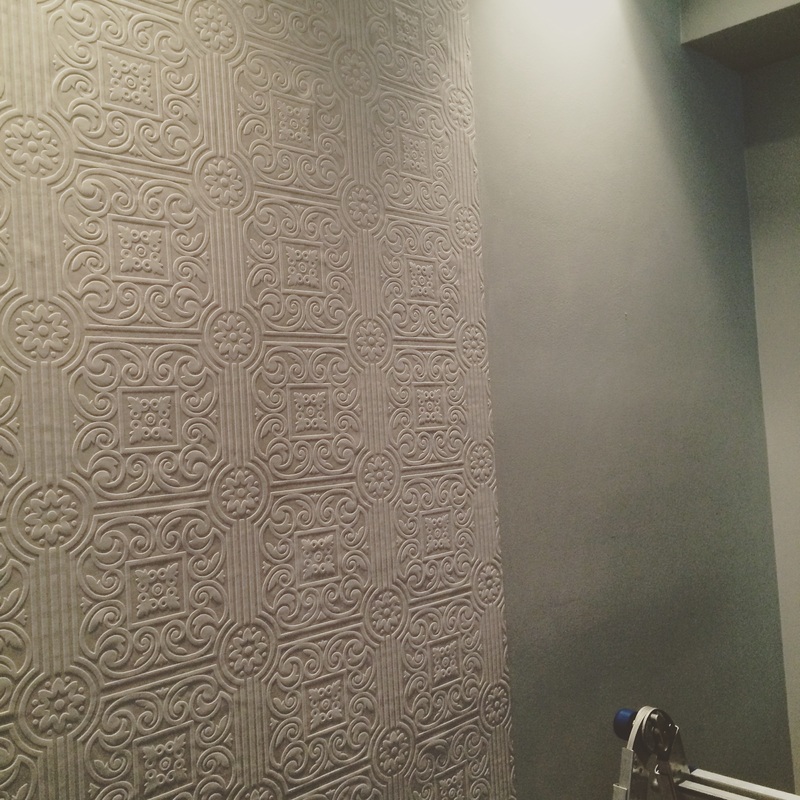
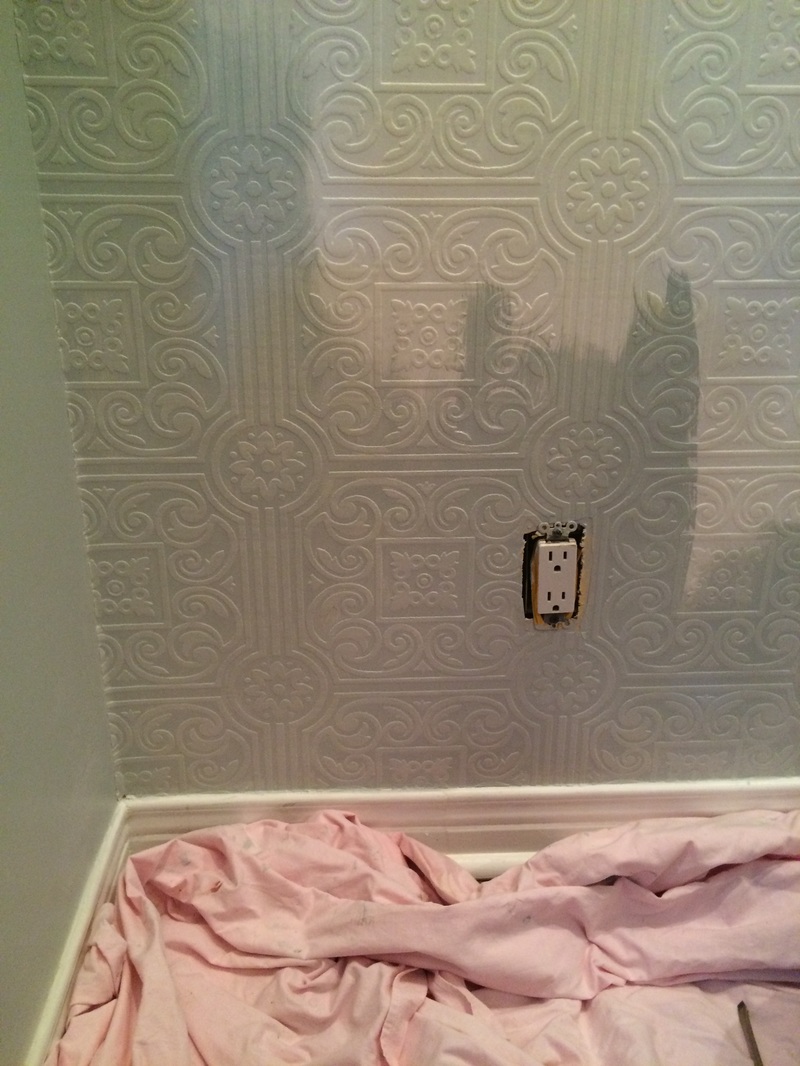
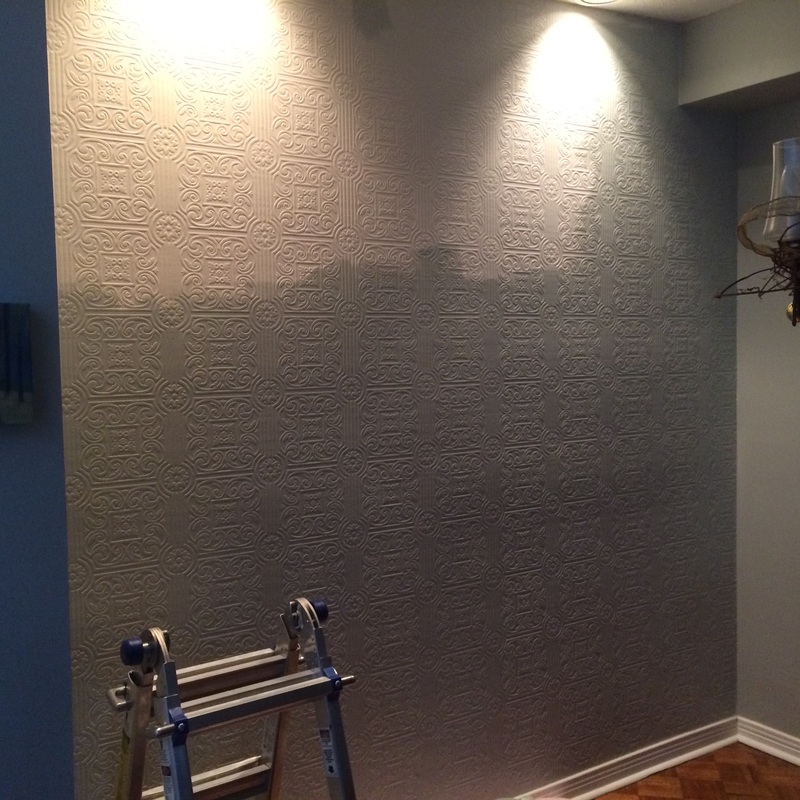
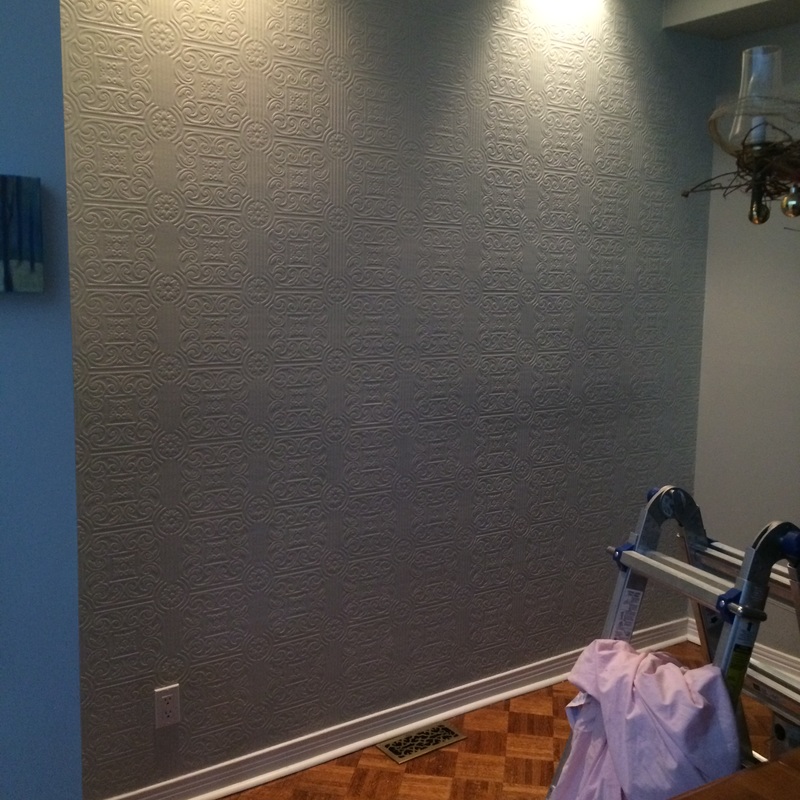
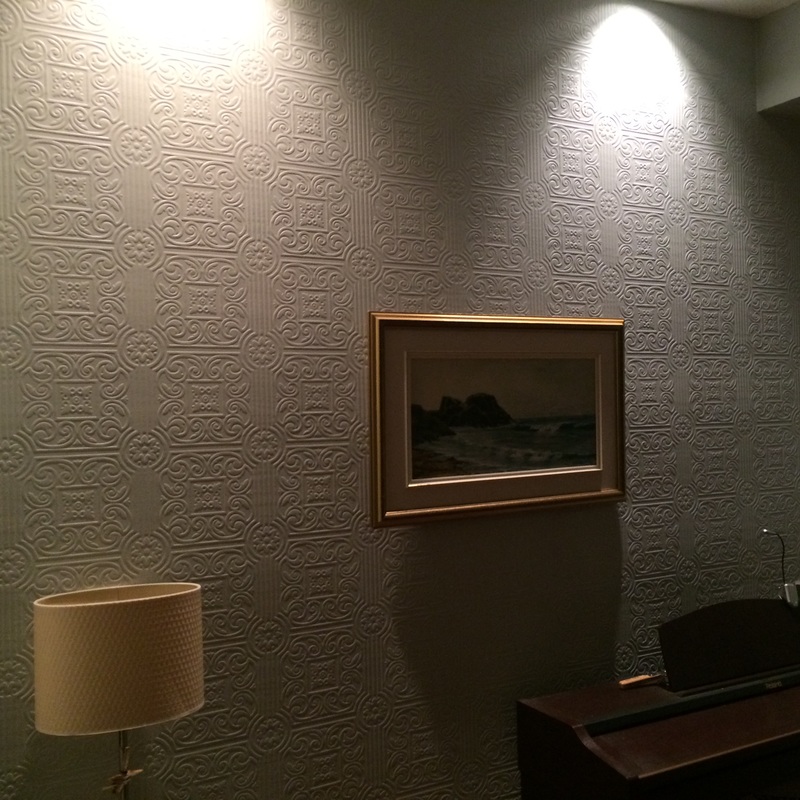
I saw some beautiful tin ceilings and walls on a trip to Prince Edward County and wanted to get that look in my home. There is a wall in my dining room begging for a PROJECT! Yippee! I've never installed wallpaper alone, used to help my mom when I was younger: almost a pro I figure! I bought paintable 'tin' patterned wallpaper off of amazon, similar products at home depot etc. I used most of two rolls for one wall. I did a lot of reading beforehand, watched youtube videos (this was a good one). Before wetting the paper: The prep and pre-cutting of the wallpaper took a while, lots of measuring. I started with the first piece on a line centred in the middle of the wall and drawn with a level. I cut each piece from the dry roll on the floor first, matching the pattern and numbered them on the back with pencil so I'd remember the order. Though the wallpaper was pre-pasted, there was lots of advice to also put on a thin layer of paste (in retrospect, I would not do this again, there was lots of excess paste). Installation: I moistened the cut pieces in groups of two: I'd take them to the bathtub, where I set up the wallpaper tray - moisten, and then fold paste side in ("booking"). I watched this video a few times before starting. Starting with the centre piece that was level worked out well and made it obvious to me our old house has wonky walls. I let the installed paper dry overnight and painted it the following day - I used a roller but had to go back with a brush to get paint on all the pattern. Level of difficulty: 3/5 Cost: $50-75 (2 rolls, wallpaper starter kit). I already had leftover paint and painting equipment. Time: 8-10 hours. I started Saturday morning and finished up later afternoon with paper installation. Painting was quick and occurred the following day. I think I'll be faster next time. Lesson Learned 1. The prep is a bit overwhelming but worth it. Once you start, you have to keep on going with the paper installation and get them in place while you can still manipulate them. Marking the centreline with a level worked well. 2. The paper was pretty stretchy once wet which was good and bad. I could push it around to match the patterns but wasn't 100% perfect. 3. A sharp blade makes a difference with all the trimming of the paper at the top and bottom. This paper was hard to trim cleanly, probably because of the stretchy-plastic nature of it. 4. Don't overly moisten the paper. 5. I think I would paint it with semi-gloss paint next time. I just used some we had left over but I think the bit of extra shine would make the pattern really stand out. Onto the next project! |
Author: Leah BartlettLover of projects, big and small! I try to not be intimidated by lack of experience/skill/know-how. Archives
September 2018
Categories
All
|
 RSS Feed
